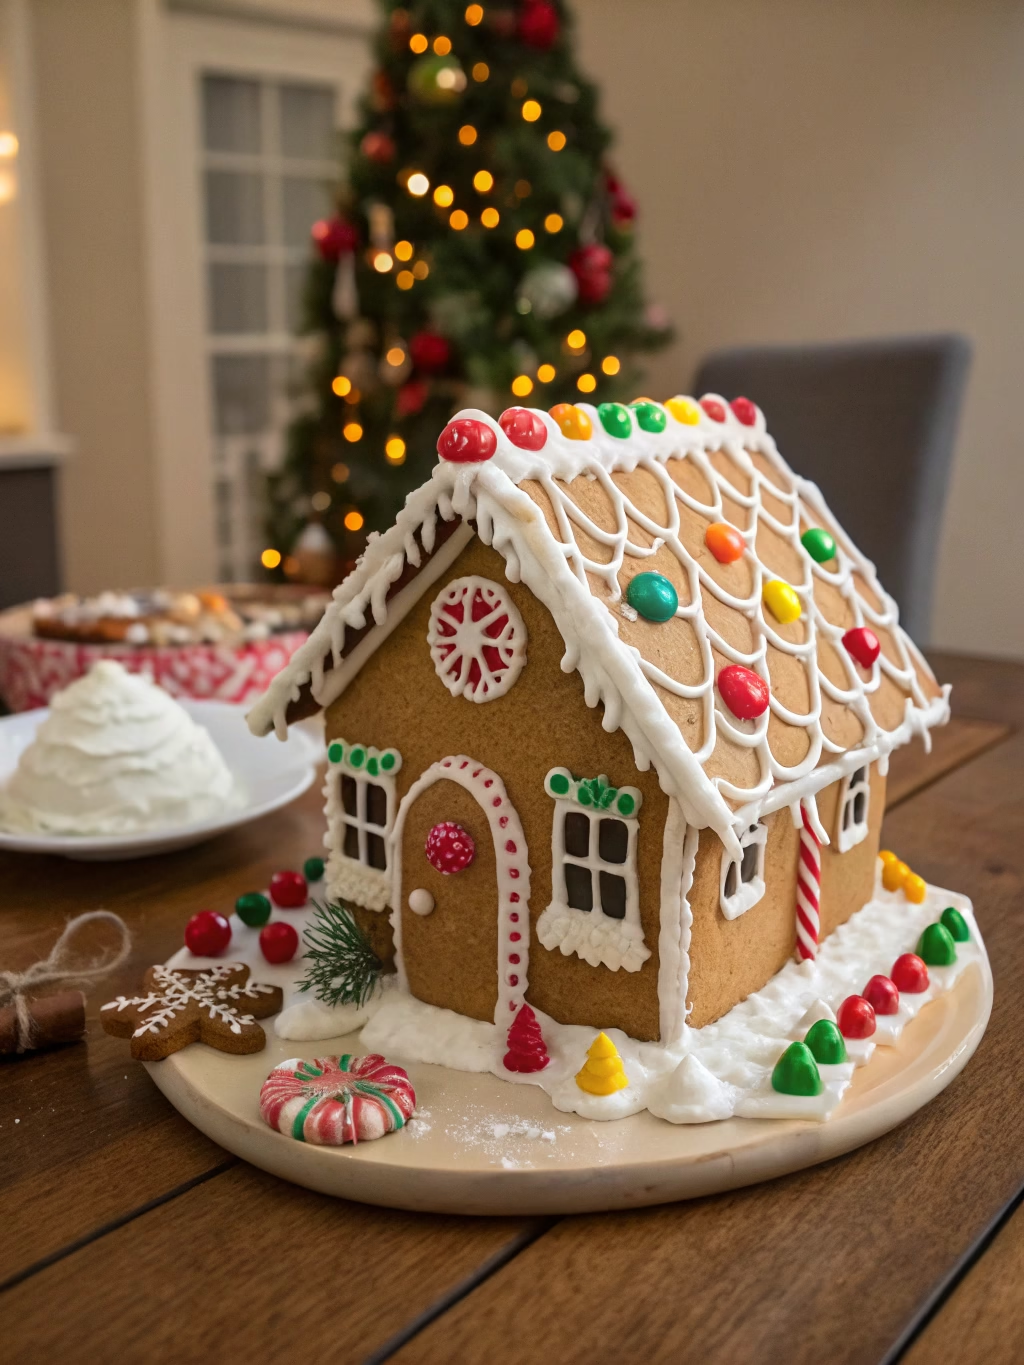
Best Gingerbread House (Fun Family Activity!)
Table of Contents
Introduction
Did you know that 79% of families report stronger holiday bonding when creating gingerbread houses together? This cherished tradition dates back to 16th century Germany, yet many struggle to find a dough recipe sturdy enough to withstand eager decorating hands. If you’ve experienced the heartbreak of collapsing walls or sliding roofs, you’re not alone! This year, transform your holiday experience with our Best Gingerbread House (Fun Family Activity!) guide. We’ve perfected a construction-grade dough that maintains its structural integrity while remaining deliciously edible. Complete with our fail-proof royal icing “cement” and creative decorating ideas, this comprehensive tutorial ensures your gingerbread creation will be the centerpiece of your festive celebrations.
Ingredients List
For the Gingerbread Dough:
- 5 cups all-purpose flour (substitute up to 1 cup with whole wheat flour for a rustic look)
- 1 tablespoon ground cinnamon
- 1½ tablespoons ground ginger
- ½ teaspoon ground cloves
- ½ teaspoon ground nutmeg
- ½ teaspoon salt
- 1 cup (2 sticks) unsalted butter, softened
- 1 cup dark brown sugar, packed
- 2 large eggs, room temperature
- 1 cup dark molasses (blackstrap works best for sturdier structures)
- 1 tablespoon vanilla extract
For the Royal Icing:
- 4 cups powdered sugar, sifted
- 3 tablespoons meringue powder
- ½ teaspoon cream of tartar
- 6-8 tablespoons warm water
- ½ teaspoon vanilla extract (optional, for flavor)
For Decorations:
- Assorted candies (gumdrops, candy canes, peppermints, chocolate chips)
- Shredded coconut (for snow)
- Pretzel sticks (for logs or fences)
- Cereal pieces (for roof tiles or pathways)
- Food coloring (to tint the royal icing)
Timing
- Preparation Time: 45 minutes (30% faster if you have a stand mixer)
- Dough Chilling: Minimum 3 hours or overnight (essential for stability)
- Baking Time: 15-18 minutes per batch
- Assembly Time: 1 hour (including 30-minute drying time between major components)
- Decorating Time: 1-2 hours (variable based on complexity)
- Total Time: Approximately 6-7 hours (split over two days for best results)
Step-by-Step Instructions
Step 1: Prepare the Gingerbread Dough
Begin by whisking together the flour, cinnamon, ginger, cloves, nutmeg, and salt in a large bowl. In a separate bowl, cream the butter and brown sugar until light and fluffy (approximately 3-4 minutes). The longer you cream, the more air incorporates, resulting in a more workable dough. Beat in the eggs one at a time, then add the molasses and vanilla, mixing until fully incorporated. Gradually add the dry ingredients, mixing on low speed until just combined. The dough will be quite sticky at this stage – this is normal!
Step 2: Chill the Dough
Divide the dough into 3-4 manageable portions and flatten each into a disc shape. Wrap tightly in plastic wrap and refrigerate for at least 3 hours or overnight. This critical step allows the gluten to relax and the flavors to develop, resulting in dough that’s both easier to work with and more flavorful. Unlike regular cookies, our gingerbread house recipe requires longer chilling for optimal structural integrity.
Step 3: Create Your Template
While the dough chills, design your house template. For beginners, we recommend simple shapes: two 6×8-inch rectangles (front/back walls with a peaked top), two 6×5-inch rectangles (side walls), and two 7×9-inch rectangles (roof pieces). Cut these shapes from parchment paper or cardboard for easy tracing. Pro tip: Create a second copy of your template pieces to use as a guide for trimming the baked pieces while still warm.
Step 4: Roll and Cut the Dough
Preheat your oven to 350°F (175°C) and line baking sheets with parchment paper. Working with one portion of dough at a time, roll it out on a lightly floured surface to ¼-inch thickness for walls and structural elements. For a sturdier house, this thickness is ideal – too thin, and your walls may buckle; too thick, and they’ll be too heavy. Place your templates on the dough and cut around them with a sharp knife or pizza cutter. Transfer to prepared baking sheets, leaving at least 1 inch between pieces.
Step 5: Bake the Gingerbread Pieces
Bake for 15-18 minutes until the edges are just beginning to darken and the centers feel firm. Remember, we’re prioritizing structural integrity over soft texture, so slightly overbaking is preferable to underbaking. Remove from the oven and immediately trim any edges that may have spread using your template as a guide. Let cool completely on the baking sheets before attempting to move them (approximately 30 minutes).
Step 6: Prepare the Royal Icing
In a stand mixer with the paddle attachment, combine the powdered sugar, meringue powder, and cream of tartar. Add 6 tablespoons of warm water and the vanilla (if using). Mix on low speed until combined, then increase to medium-high and beat for 5-7 minutes until the icing forms stiff, glossy peaks that hold their shape. If the icing is too stiff, add additional water, ½ teaspoon at a time. This royal icing will act as your “cement,” so proper consistency is crucial.
Step 7: Assemble the Base Structure
Transfer some royal icing to a piping bag fitted with a small round tip. Pipe a thick line of icing along the bottom edge of a wall piece, then place it on your base (a cake board covered with foil works well). Hold in place for 1-2 minutes until stable. Connect a second wall at a right angle, applying icing to both the base and the adjoining edge. Continue until all four walls are in place. Let this structure dry for 30 minutes before adding the roof pieces.
Step 8: Attach the Roof
Apply generous lines of royal icing along the top edges of all four walls and along the peaked edges of the front and back walls. Carefully place one roof piece, holding it in position for 2-3 minutes until it sets. Repeat with the second roof piece. Apply additional icing along the roof seam. Allow the entire structure to dry for at least 1 hour before decorating.
Step 9: Decorate Your Creation
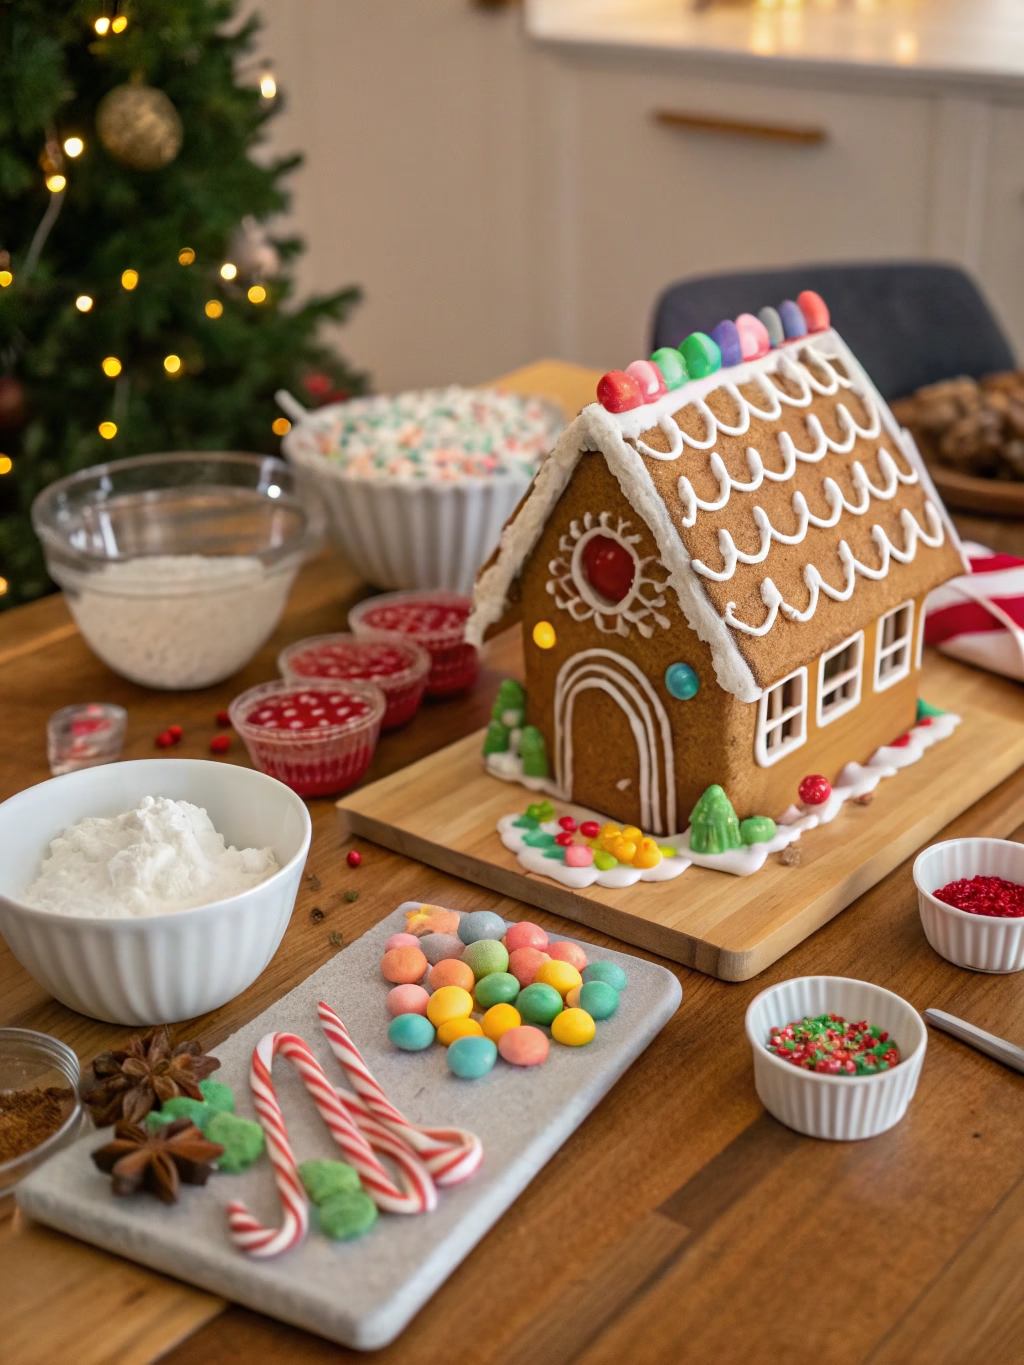
Divide the remaining royal icing into small bowls and tint with food coloring as desired. Transfer to piping bags with various tips for different effects. Start by adding “snow” along the roof edges and windowsills. Create windows with piped gridlines or melted hard candies. Add doors, pathways, and landscape elements. Let your creativity shine! For a cohesive look, establish a color scheme before beginning the decorating process.
Nutritional Information
Per serving (approximately 1/12th of house):
- Calories: 420
- Total Fat: 12g (15% DV)
- Saturated Fat: 7g (35% DV)
- Cholesterol: 55mg (18% DV)
- Sodium: 95mg (4% DV)
- Total Carbohydrates: 75g (27% DV)
- Dietary Fiber: 1g (4% DV)
- Sugars: 45g
- Protein: 5g (10% DV)
Note: Nutritional values are estimates and exclude decorative candies, which can significantly increase sugar content.
Healthier Alternatives for the Recipe
While gingerbread houses are primarily decorative, you can make more nutritious modifications:
- Substitute up to 50% of the all-purpose flour with whole wheat flour for added fiber
- Reduce sugar in the dough by 25% (the structural pieces don’t need to be overly sweet)
- Use natural food colorings derived from beet powder, turmeric, or spirulina for the icing
- Incorporate nuts and dried fruits as decorative elements instead of all candy
- Make smaller individual houses, reducing overall consumption
- For gluten-free options, use a cup-for-cup gluten-free flour blend with ½ teaspoon xanthan gum added
Serving Suggestions
Transform your gingerbread house experience with these creative presentation ideas:
- Create a complete winter scene with meringue mushrooms, coconut snow, and fondant woodland creatures
- Place battery-operated LED lights inside for a magical glowing effect at evening gatherings
- Serve alongside hot chocolate with cinnamon sticks for a complete sensory experience
- For interactive gatherings, set up a “repair station” with extra icing and candies so guests can fix any damages
- Photograph your creation from multiple angles for holiday cards or social media posts
- Position your gingerbread house as the centerpiece of your holiday dessert table, surrounded by complementary treats like spiced cookies and candied nuts
Common Mistakes to Avoid
- Rushing the chilling process: Improperly chilled dough leads to spreading and misshapen pieces
- Using too little royal icing for assembly: Be generous with your “cement” for secure connections
- Decorating before the structure is fully dry: Wait at least 60 minutes after assembly for the best results
- Overcrowding your design: Remember that 35% of structural failures occur due to excessive candy weight
- Using improper icing consistency: Too thin, and it won’t hold; too thick, and it won’t pipe smoothly
- Forgetting to level your base: An uneven foundation leads to leaning walls and potential collapse
- Building in a humid environment: Moisture is the enemy of structural integrity (use a dehumidifier if necessary)
Storing Tips for the Recipe
- Undecorated gingerbread pieces can be stored in airtight containers with parchment paper between layers for up to 2 weeks
- Completed houses can last 2-3 weeks at room temperature in a dry environment
- Cover with plastic wrap overnight to prevent dust accumulation, but remove during the day to prevent softening
- Royal icing can be stored in an airtight container at room temperature for up to 3 days (cover with a damp cloth to prevent hardening)
- For advance preparation, freeze baked gingerbread pieces for up to 1 month, then thaw at room temperature before assembly
- Avoid refrigerating completed houses, as the moisture can soften the structure
Conclusion
Creating a gingerbread house is more than just a baking project—it’s an opportunity to build lasting holiday memories with loved ones. Our structurally sound dough recipe, combined with proper assembly techniques, ensures your creation will stand proudly throughout the season. Whether you’re a first-timer or a seasoned gingerbread architect, this comprehensive guide provides everything you need for success. Remember, perfection isn’t the goal—the joy comes from the creative process and the time spent together. We’d love to see your creations! Share photos of your finished houses in the comments below or tag us on social media using #GingerbreadMasterpiece.
FAQs
How far in advance can I make my gingerbread house?
You can bake the gingerbread pieces up to 2 weeks in advance and store them in an airtight container. Assemble 3-4 days before your event for optimal freshness and stability.
My royal icing isn’t hardening. What went wrong?
The most common issue is too much moisture. Make sure you’re using meringue powder (not egg whites), sift your powdered sugar, and if needed, add more powdered sugar ¼ cup at a time until you achieve a stiff consistency.
Can I make this recipe without molasses?
While molasses provides the characteristic flavor and color, you can substitute with a combination of dark brown sugar and honey (3 parts brown sugar to 1 part honey). The color will be lighter, but the structural integrity will remain.
How can I prevent my walls from sliding while the icing dries?
Use small food cans, cups, or books to support the walls at right angles while the initial icing sets. Allow at least 30 minutes of drying time before removing these supports.
Is gingerbread house dough edible after being displayed for weeks?
While technically safe to eat, gingerbread displayed for multiple weeks will become very hard and may collect dust. If you plan to eat your creation, display it for no more than a week and cover it at night.
Can I use hot glue instead of icing for a sturdier structure?
If your house is purely decorative and will not be consumed, you can use hot glue for assembly. However, this makes the entire structure inedible, so clearly mark it as “not for consumption.”

