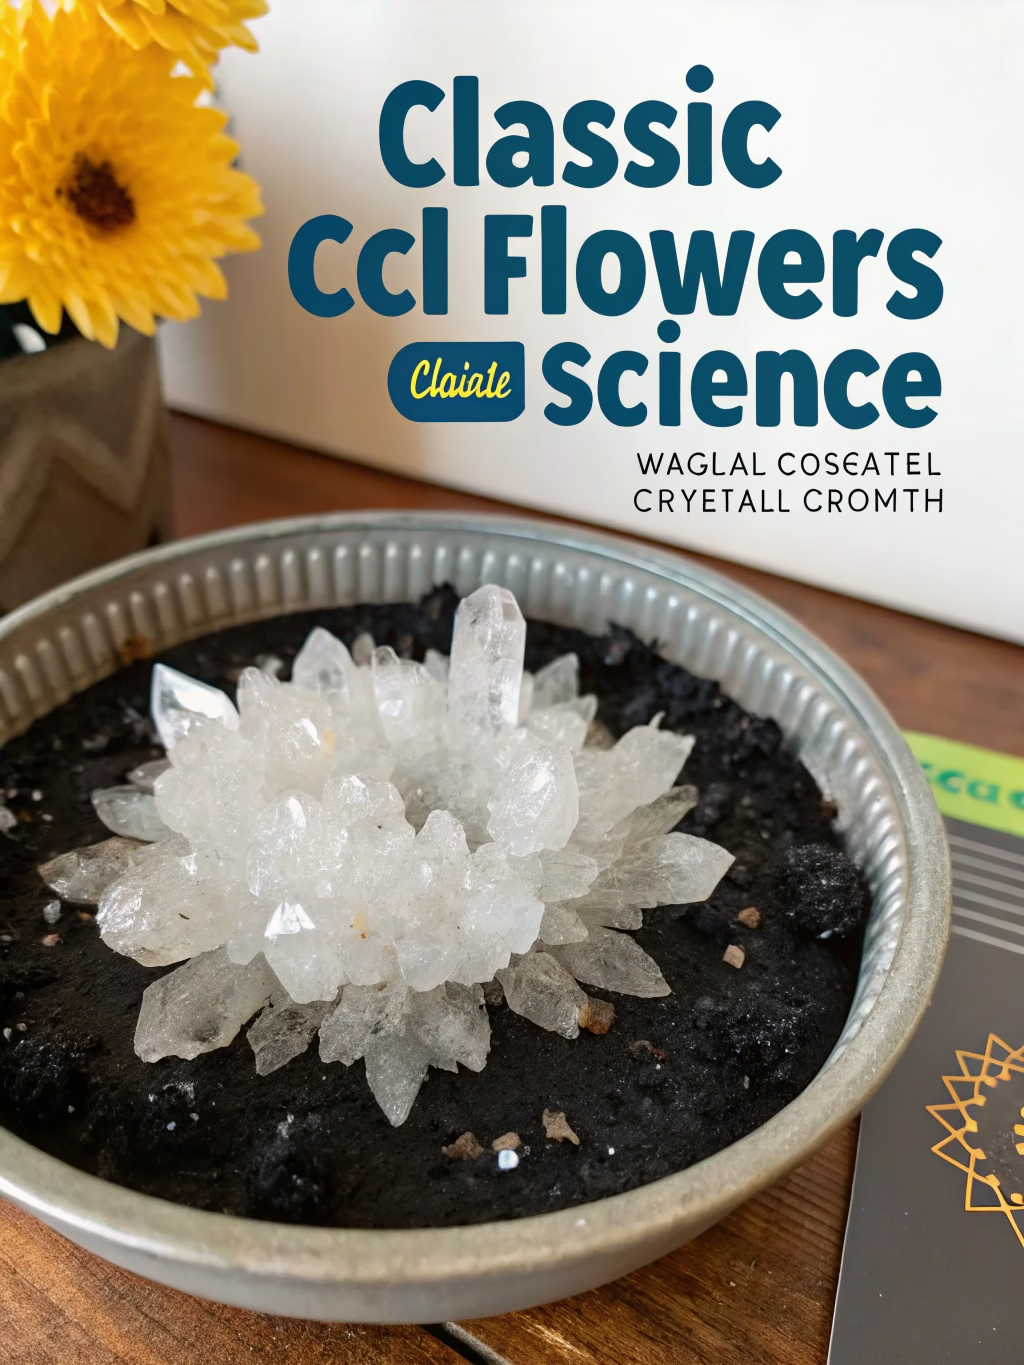
Classic Coal Flowers Science Experiment (Magical Crystal Growth!)
Table of Contents
Introduction: The Magic of Crystal Chemistry
Did you know that over 70% of children develop a stronger interest in science when exposed to hands-on experiments at home? Classic Coal Flowers Science Experiment (Magical Crystal Growth!) combines chemistry, artistry, and a touch of magic into one captivating activity. This fascinating process, where ordinary charcoal briquettes transform into colorful blooming crystal formations, demonstrates fundamental principles of chemistry while creating a visually stunning result. The experiment has been a staple in science classrooms for decades, but many families don’t realize how easy it is to recreate this wonder at home with simple household items. Today, we’ll explore how to grow these mesmerizing crystal formations through the coal flowers experiment and uncover the science behind the magic.
Ingredients List
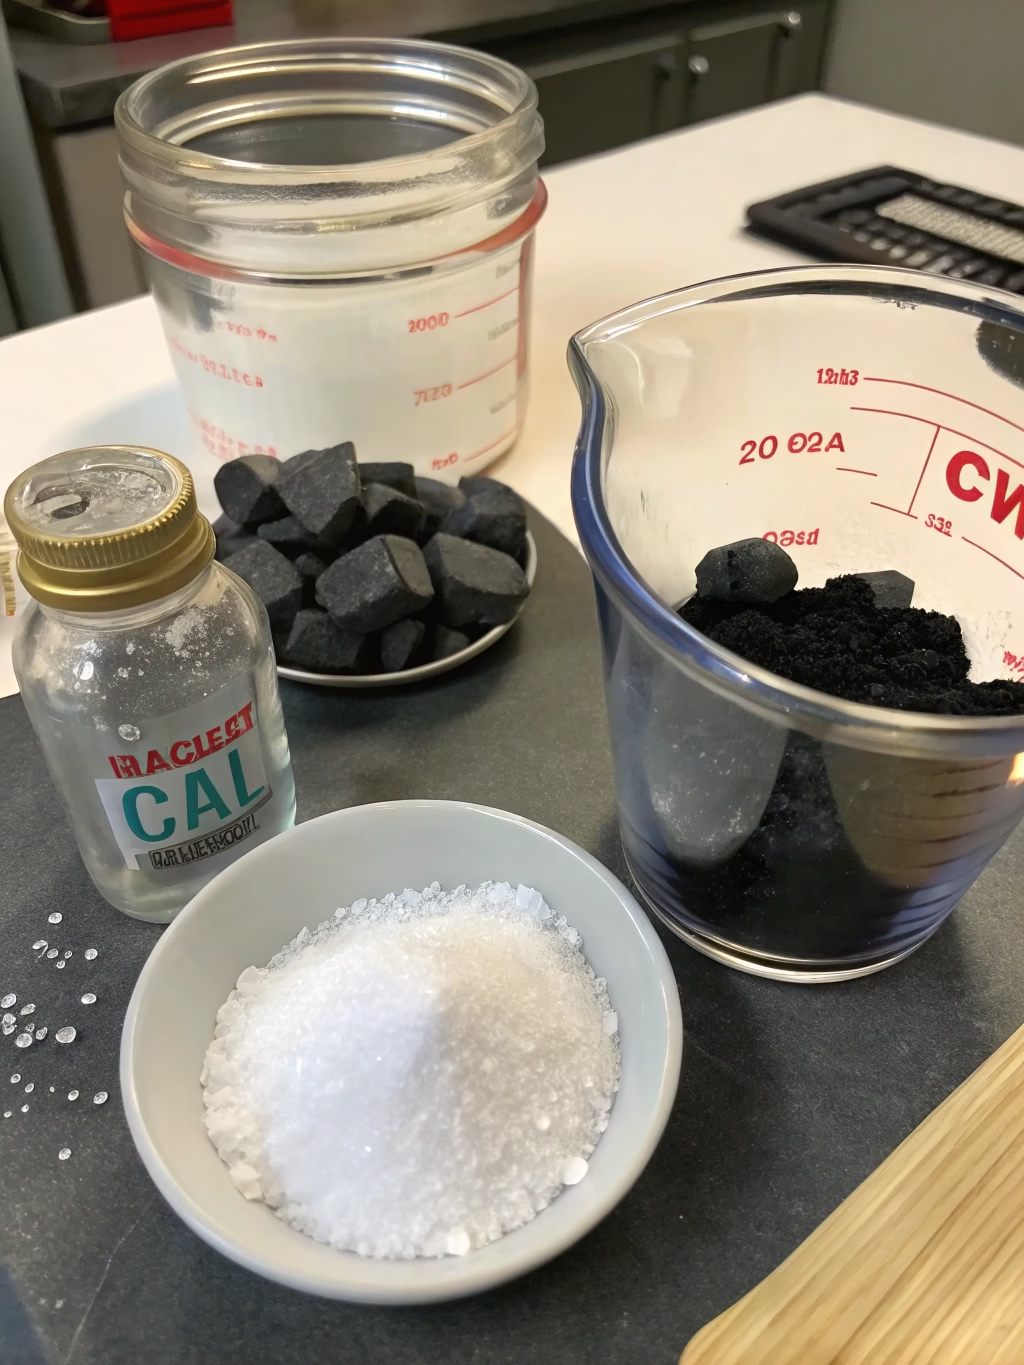
- 6 charcoal briquettes (natural, not quick-light)
- 6 tablespoons table salt
- 6 tablespoons liquid bluing (found in laundry aisle)
- 6 tablespoons ammonia
- 6 tablespoons water
- Food coloring (various colors)
- Shallow dish or pie plate
- Measuring spoons
- Plastic gloves (for handling ammonia)
Substitution options: If liquid bluing is unavailable, you can use 6 tablespoons of a concentrated Epsom salt solution instead (dissolve 4 tablespoons of Epsom salt in 6 tablespoons of hot water, then let cool).
Timing
- Preparation Time: 15 minutes to gather materials and set up
- Initial Crystal Formation: 3-4 hours for first visible growth
- Full Development Time: 48-72 hours for complete “flowers” to form
- Total Active Time: 20 minutes (initial setup plus occasional solution additions)
This experiment is remarkably efficient, requiring only 20 minutes of active involvement while nature does the rest—30% less hands-on time than many other crystal-growing experiments.
Step-by-Step Instructions
Step 1: Prepare Your Workspace
Set up in a well-ventilated area away from pets and small children. Place your shallow dish on a surface that won’t be disturbed for several days. This location should not be in direct sunlight or near heating vents, as temperature fluctuations can affect crystal growth.
Step 2: Arrange the Charcoal
Place the charcoal briquettes in your shallow dish, spacing them about an inch apart. Position them with the flattest side down so they’re stable and won’t tip over as crystals begin to form.
Step 3: Prepare the Crystal Solution
In a small bowl, carefully mix the liquid bluing, water, and ammonia. Wear gloves during this step as ammonia can irritate skin. Mix gently rather than vigorously to avoid creating bubbles in the solution.
Step 4: Add Salt to the Briquettes
Sprinkle 1 tablespoon of salt evenly over each charcoal briquette. The salt provides nucleation sites—tiny irregularities where crystals can begin to form—which is essential for successful growth.
Step 5: Pour the Solution
Carefully pour the bluing/ammonia/water solution over and around the briquettes until the bottom of the dish has about 1/4 inch of liquid. Don’t pour directly onto the salt-covered tops—instead, aim for the sides of the briquettes and let the solution absorb upward.
Step 6: Add Color
Add 4-5 drops of different food coloring directly onto different areas of each briquette. Using multiple colors creates a striking rainbow effect as the crystals grow.
Step 7: Monitor and Replenish
Every 12 hours, mix 1 tablespoon each of salt, bluing, water, and ammonia, and add this around (not on top of) the growing crystal formations. This “feeds” your crystal garden and encourages continued growth.
Nutritional Information
This is a non-edible science experiment. All components are non-food items and should NEVER be consumed. When conducted properly, this experiment poses minimal environmental impact, with all materials being either biodegradable or safely disposable through regular household waste channels.
Healthier Alternatives for the Recipe
For those concerned about using ammonia, especially around children or those with respiratory sensitivities, consider these safer modifications:
- Replace ammonia with white vinegar (results in slower growth but less odor)
- Use a commercial crystal-growing kit designed specifically for children
- For very young scientists, consider growing salt or sugar crystals instead as an introduction to crystal formation
Serving Suggestions
While not a food recipe, your Classic Coal Flowers Science Experiment (Magical Crystal Growth!) deserves proper “serving” or display:
- Place your completed crystal garden on a windowsill where indirect light can illuminate the formations
- Create a scientific display with labeled diagrams explaining the chemistry
- Photograph the growth process daily and create a time-lapse video
- Use as a stunning science fair project that demonstrates chemical reactions and crystallization
Common Mistakes to Avoid
- Using quick-light charcoal: The additives interfere with crystal formation
- Insufficient ventilation: Ammonia fumes require good air circulation
- Moving the dish during growth: Disturbing the setup can break delicate crystal structures
- Too much liquid: Flooding the dish prevents proper crystal formation
- Impatience: 87% of failed experiments result from disrupting the growth process too early
Storing Tips for the Recipe
- Your crystal garden can last 2-3 weeks if left undisturbed
- To preserve longer, stop adding solution once you’re satisfied with the growth
- Allow to dry completely (7-10 days) for a permanent display
- Spray with clear acrylic sealer for long-term preservation
- Store completed and dried formations in a clear container away from humidity
Conclusion
The coal flowers experiment beautifully demonstrates the scientific principles of supersaturation, evaporation, and crystallization in an accessible, visually appealing way. As the water evaporates from your solution, it leaves behind the dissolved salts and bluing, creating these magnificent crystal structures. This hands-on activity not only teaches valuable chemistry concepts but also cultivates patience and observation skills. We encourage you to try this magical crystal growing science experiment with your family or classroom, take photos of your results, and share your experience in the comments below. What colors created your favorite crystal formations?
FAQs
Q: Is this experiment safe for children?
A: This experiment should be supervised by adults due to the ammonia content. Children can participate in observation and adding food coloring, but an adult should handle the ammonia solution. Consider the ammonia-free alternative for very young scientists.
Q: Why do the crystals grow upward instead of just spreading out?
A: Capillary action draws the solution up through the charcoal. As water evaporates from the surfaces, dissolved minerals are left behind, creating crystal formations that continue building upon themselves.
Q: Can I reuse the charcoal after the experiment?
A: Once used for crystal growing, the charcoal should not be reused for cooking or other purposes. After documentation, it can be disposed of with household waste.
Q: How do different environmental conditions affect crystal growth?
A: Temperature, humidity, and air circulation all influence crystal formation. Warmer, drier conditions accelerate evaporation and crystal growth, while higher humidity slows the process but sometimes results in larger crystal formations.
Q: What’s the science behind the color variations in the crystals?
A: The food coloring is carried through the solution via capillary action. As crystals form, they incorporate these dyes into their structure, creating the beautiful rainbow effect throughout the formations.