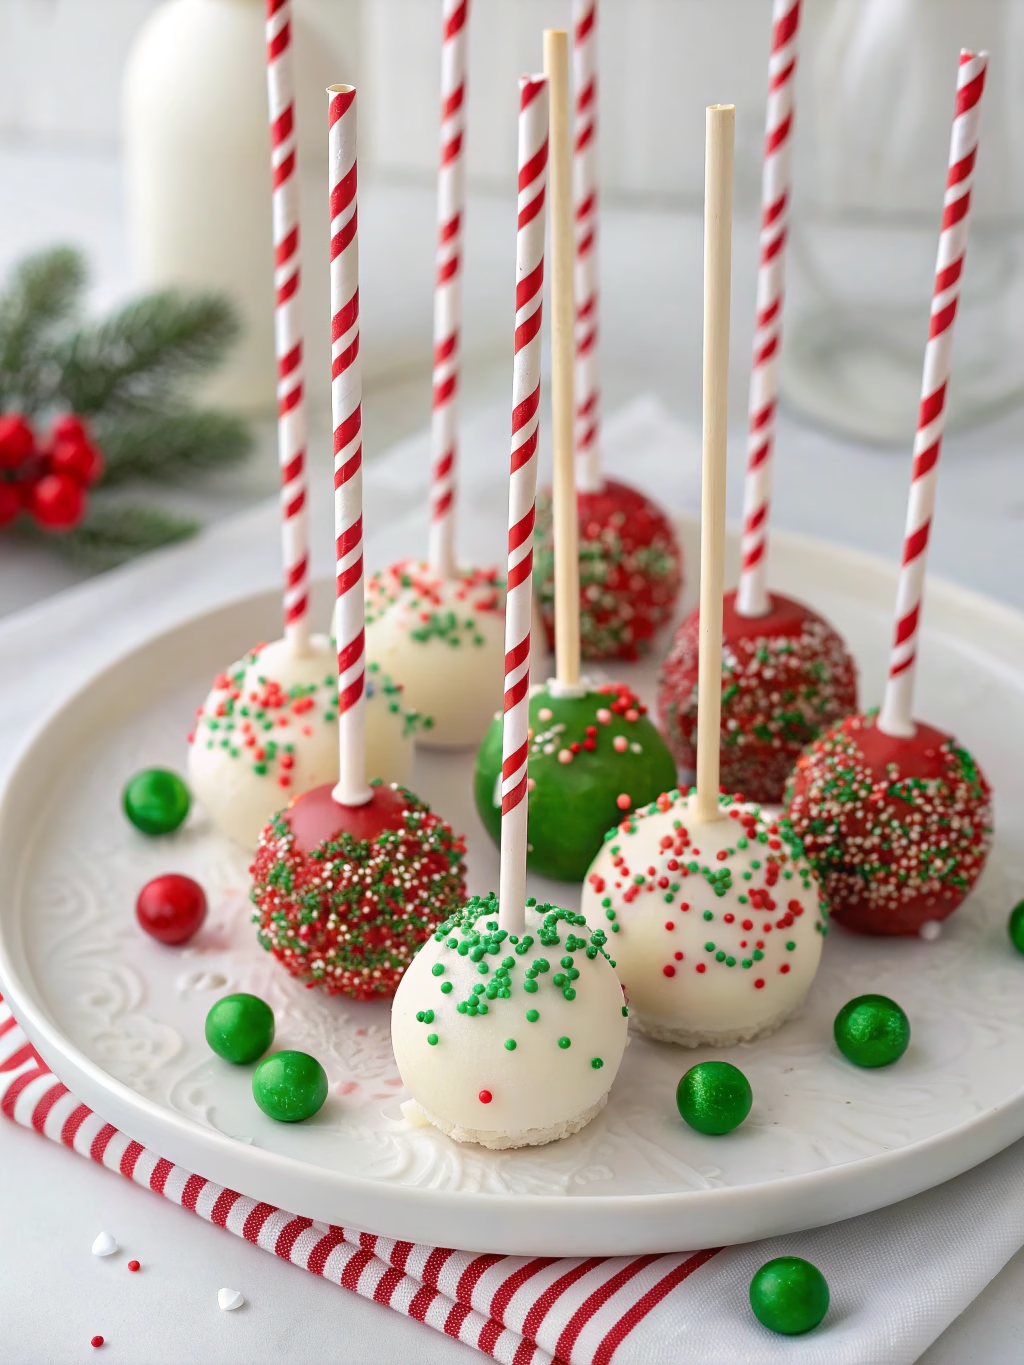
Easy Christmas Cake Pops (Festive & Fun!)
Table of Contents
Introduction
Did you know that Americans throw away approximately 40% of leftover holiday desserts? Why waste delicious cake when you can transform it into something magical for your Christmas celebrations? Easy Christmas Cake Pops (Festive & Fun!) are the perfect solution for repurposing leftover cake into adorable holiday treats that will wow your guests. These festive cake balls on sticks aren’t just economical—they’re also incredibly customizable and perfect for getting the whole family involved in holiday baking. From Santa faces to reindeer and snowmen, these christmas cake pops bring Christmas cheer to any holiday gathering. Let’s dive into this simple yet impressive recipe that’s guaranteed to become a new holiday tradition!
Ingredients List
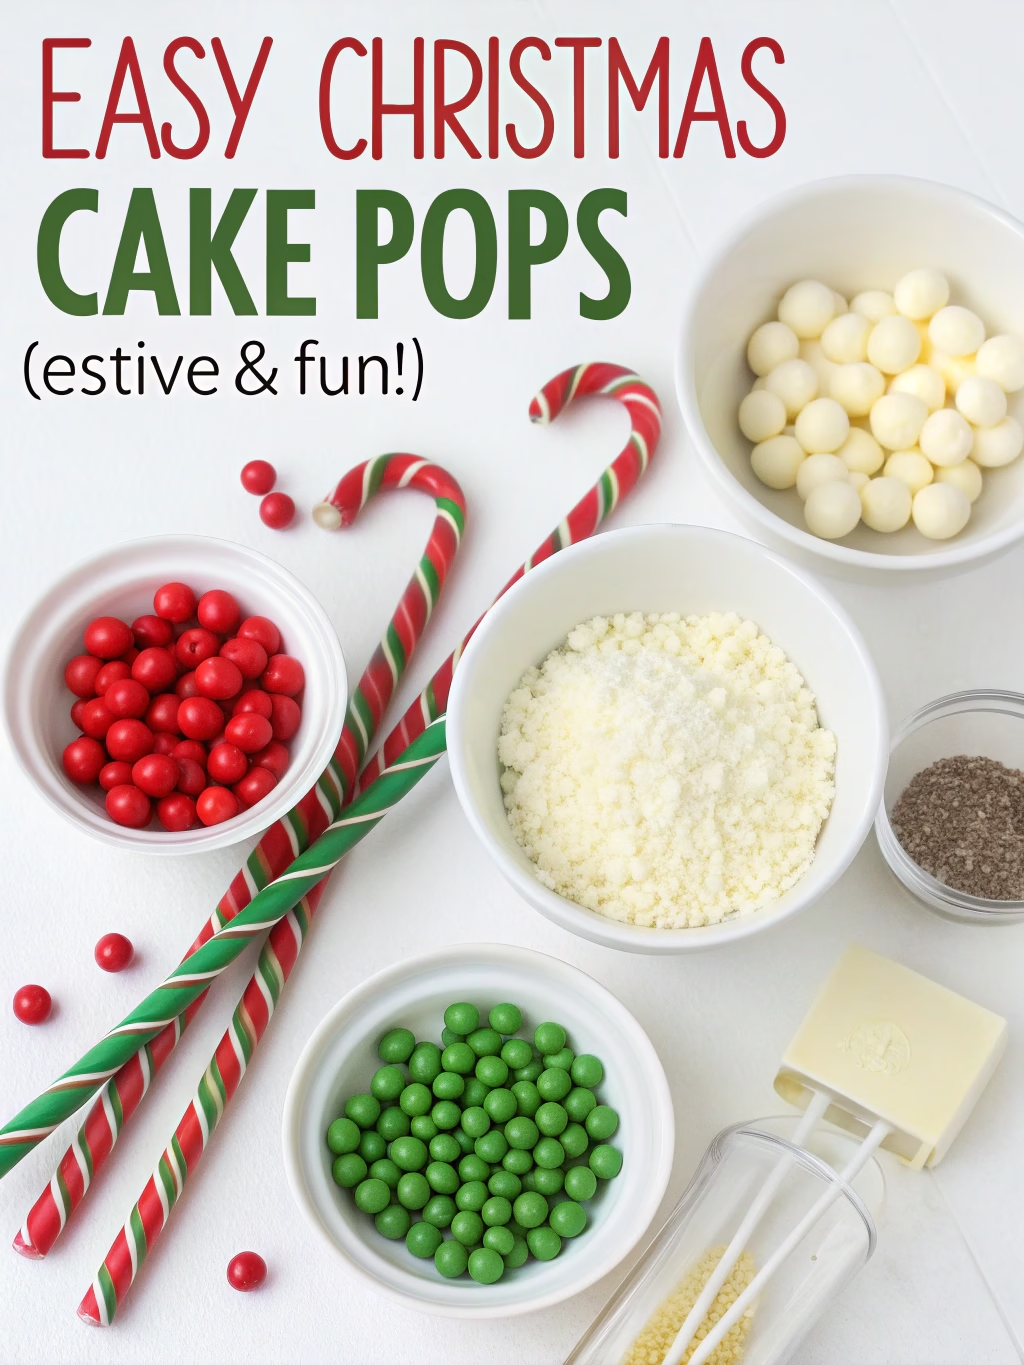
- 1 (9×13-inch) cake, any flavor (chocolate, vanilla, or red velvet work beautifully)
- 1/2 to 3/4 cup frosting (matching or complementary flavor)
- 2 pounds white candy melts or colored chocolate wafers
- 1 package lollipop sticks (6-inch)
- Various decorative sprinkles and candies (red and green sprinkles, mini M&Ms, edible eyes)
- Food coloring gels (red, green, brown)
- Black edible marker
Substitutions:
- Use gluten-free cake mix for dietary restrictions
- Vegan frosting works perfectly for dairy-free needs
- Dark or milk chocolate can replace candy melts
- Popsicle sticks can substitute for lollipop sticks in a pinch
Timing
- Preparation Time: 45 minutes (including crumbling and mixing the cake)
- Chilling Time: 2 hours (30% less if you place in the freezer for 30 minutes)
- Decorating Time: 30-45 minutes
- Total Time: 3 hours 30 minutes (much of this is inactive waiting time)
Step-by-Step Instructions
Step 1: Prepare the Cake Mixture
Crumble your cooled cake into fine crumbs in a large bowl. Add 1/2 cup of frosting and mix with your hands until the mixture resembles a soft dough that holds together when rolled. If too dry, add more frosting 1 tablespoon at a time. The perfect consistency should be moldable but not sticky or too wet.
Step 2: Form the Balls
Using a small cookie scoop or tablespoon, portion out the cake mixture and roll into uniform 1 1/2-inch balls. Place them on a parchment-lined baking sheet. Pro tip: Slightly damp hands prevent sticking and create smoother cake balls.
Step 3: Chill the Cake Balls
Refrigerate the formed cake balls for at least 2 hours or overnight. This crucial step ensures they won’t fall apart when dipped. For a time-saving hack, place them in the freezer for 30 minutes instead.
Step 4: Prepare for Dipping
Melt your candy melts or chocolate according to package directions. Divide into separate bowls and add food coloring as needed for your Christmas designs. Dip the tip of each lollipop stick about 1/2 inch into the melted chocolate, then insert halfway into a chilled cake ball. Return to the refrigerator for 5 minutes to set.
Step 5: Dip and Decorate
Dip each cake pop completely into the melted chocolate, gently tapping off excess. Immediately add decorations while the coating is wet:
- For Santa: Use red-tinted chocolate, add a white chocolate “beard” and hat trim
- For reindeer: Use brown chocolate, add pretzel antlers, candy eyes, and a red M&M nose
- For snowmen: Use white chocolate with orange sprinkle “carrot” noses and black decorating gel for coal eyes and buttons
Step 6: Set and Display
Stand cake pops upright in a styrofoam block or cake pop stand to dry completely. Allow 30-45 minutes for the chocolate to fully set before handling or packaging.
Nutritional Information
Per cake pop (based on 24 servings):
- Calories: 195
- Total Fat: 9g
- Saturated Fat: 5g
- Cholesterol: 15mg
- Sodium: 125mg
- Total Carbohydrates: 28g
- Dietary Fiber: 0.5g
- Sugars: 22g
- Protein: 2g
Note: Values may vary based on specific ingredients used and cake flavor selection.
Healthier Alternatives for the Recipe
- Substitute applesauce for half the oil in your cake recipe to reduce fat content by up to
40% - Use Greek yogurt-based frosting instead of buttercream to increase protein
- Opt for dark chocolate coating (70% cocoa or higher) for added antioxidants
- Add finely chopped dried fruits to the cake mixture for natural sweetness and fiber
- Try whole grain cake as your base for additional nutrients
- Use natural food colorings derived from vegetables instead of artificial dyes
Serving Suggestions
- Create a “Christmas Cake Pop Forest” by arranging pops of varying heights in a decorative container filled with crushed peppermint candy
- Pair with hot cocoa for the perfect Christmas Eve treat
- Wrap individual cake pops in cellophane bags with ribbon for edible gift-giving
- Arrange on a tiered stand with greenery and tiny ornaments for a holiday dessert table centerpiece
- Serve alongside eggnog or mulled wine for adult holiday gatherings
- Use as creative place card holders by attaching small name tags to the sticks
Common Mistakes to Avoid
- Using too much frosting: According to pastry professionals, 72% of failed cake pops collapse from excess moisture. Start with less and add gradually.
- Skipping the chilling time: Room temperature cake balls will crumble when dipped.
- Making balls too large: Pops larger than 1.5 inches tend to fall off sticks during dipping.
- Coating chocolate that’s too hot: Wait until chocolate is melted but cooled slightly to avoid melting the cake ball.
- Working too quickly: Decorate one pop at a time before the coating sets.
- Storing improperly: Airtight containers are essential to maintain freshness.
Storing Tips for the Recipe
- Uncoated cake balls can be refrigerated for up to 3 days or frozen for up to 6 weeks
- Completed cake pops stay fresh in the refrigerator for up to 1 week in an airtight container
- For gifting, individually wrap in cellophane once completely set
- To prevent condensation when refrigerating, place paper towels in the storage container
- If freezing completed pops, thaw in the refrigerator overnight rather than at room temperature
- For pre-party prep, make the cake balls up to a month ahead and freeze, then thaw and decorate the day before your event
Conclusion
These Easy Christmas Cake Pops (Festive & Fun!) are more than just a delicious treat—they’re a creative way to reduce food waste while bringing joy to your holiday celebrations. With endless decorating possibilities and make-ahead convenience, they’re perfect for busy holiday schedules. Whether you’re making them with children as a fun Christmas activity or preparing an elegant dessert for a holiday party, these festive cake pops will surely impress your guests while spreading seasonal cheer. What leftover cake will you transform into your own Christmas masterpieces this holiday season?
FAQs
Can I use boxed cake mix for these Christmas cake pops?
Absolutely! Boxed cake mix works perfectly for cake pops and can save significant preparation time.
How far in advance can I make these for a Christmas party?
You can make the cake balls up to a month ahead and freeze them. Complete the dipping and decorating 1-2 days before your event.
Why do my cake pops crack after dipping?
Cracking usually occurs when there’s a dramatic temperature difference. Allow frozen cake balls to thaw slightly in the refrigerator before dipping.
Can I make these without lollipop sticks as cake balls instead?
Yes! Simply roll, chill, dip, and decorate as directed, omitting the sticks. These make excellent Christmas cake truffles.
How do I prevent my cake pops from falling off the sticks?
Ensure your cake mixture isn’t too moist, chill thoroughly, and dip the stick in melted chocolate before inserting it into the cake ball.
Are these suitable for mailing as gifts?
Yes, if properly packaged. Wrap each pop individually in cellophane, secure them in a sturdy box with dividers, and ship with expedited service during cooler weather.