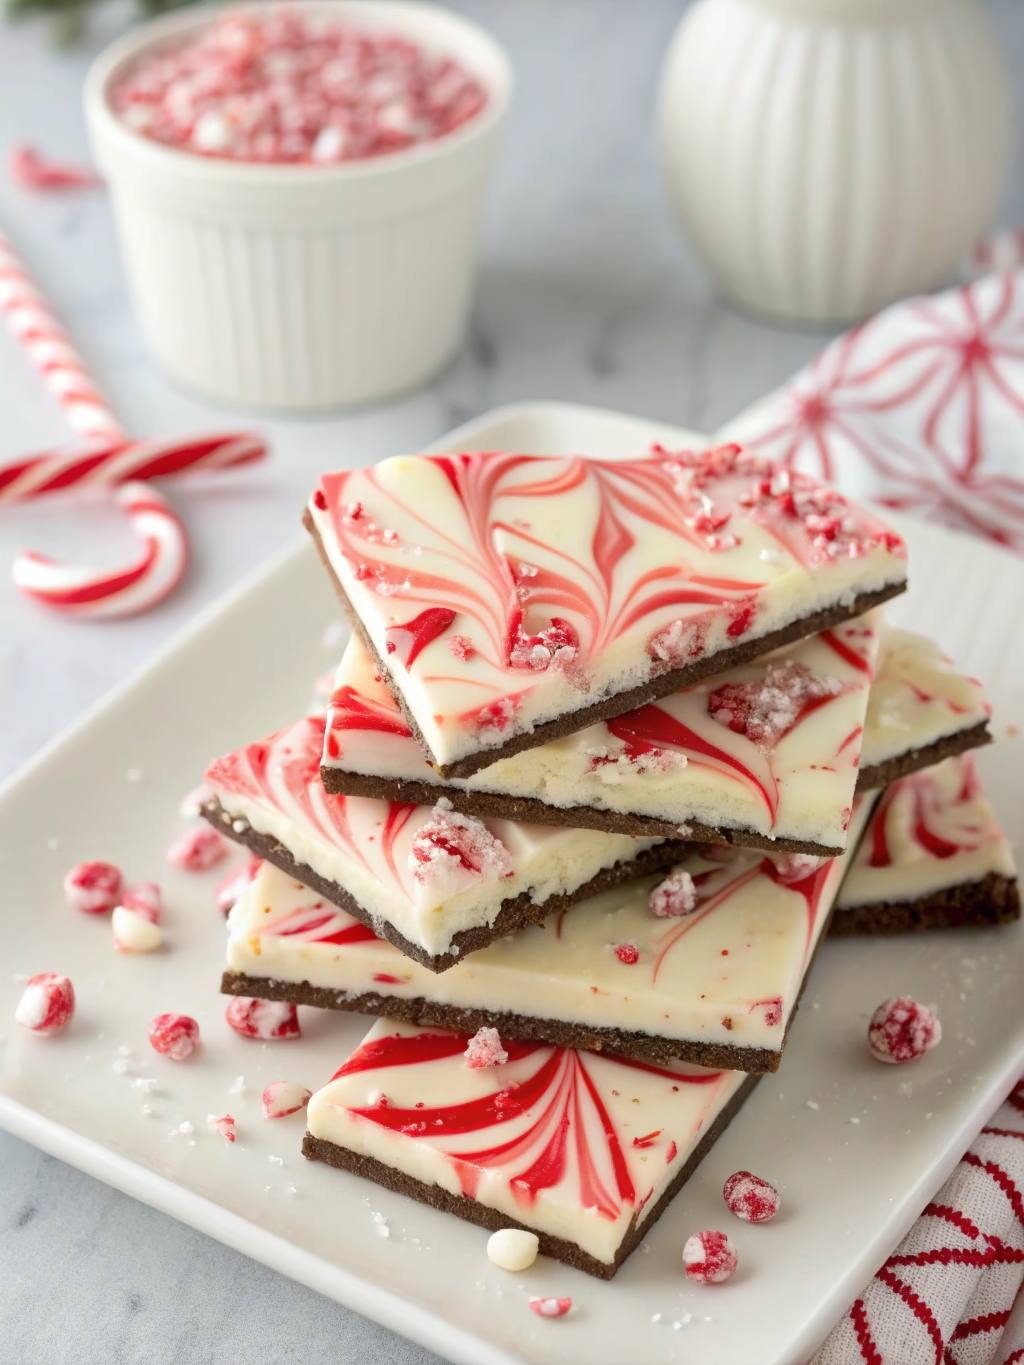
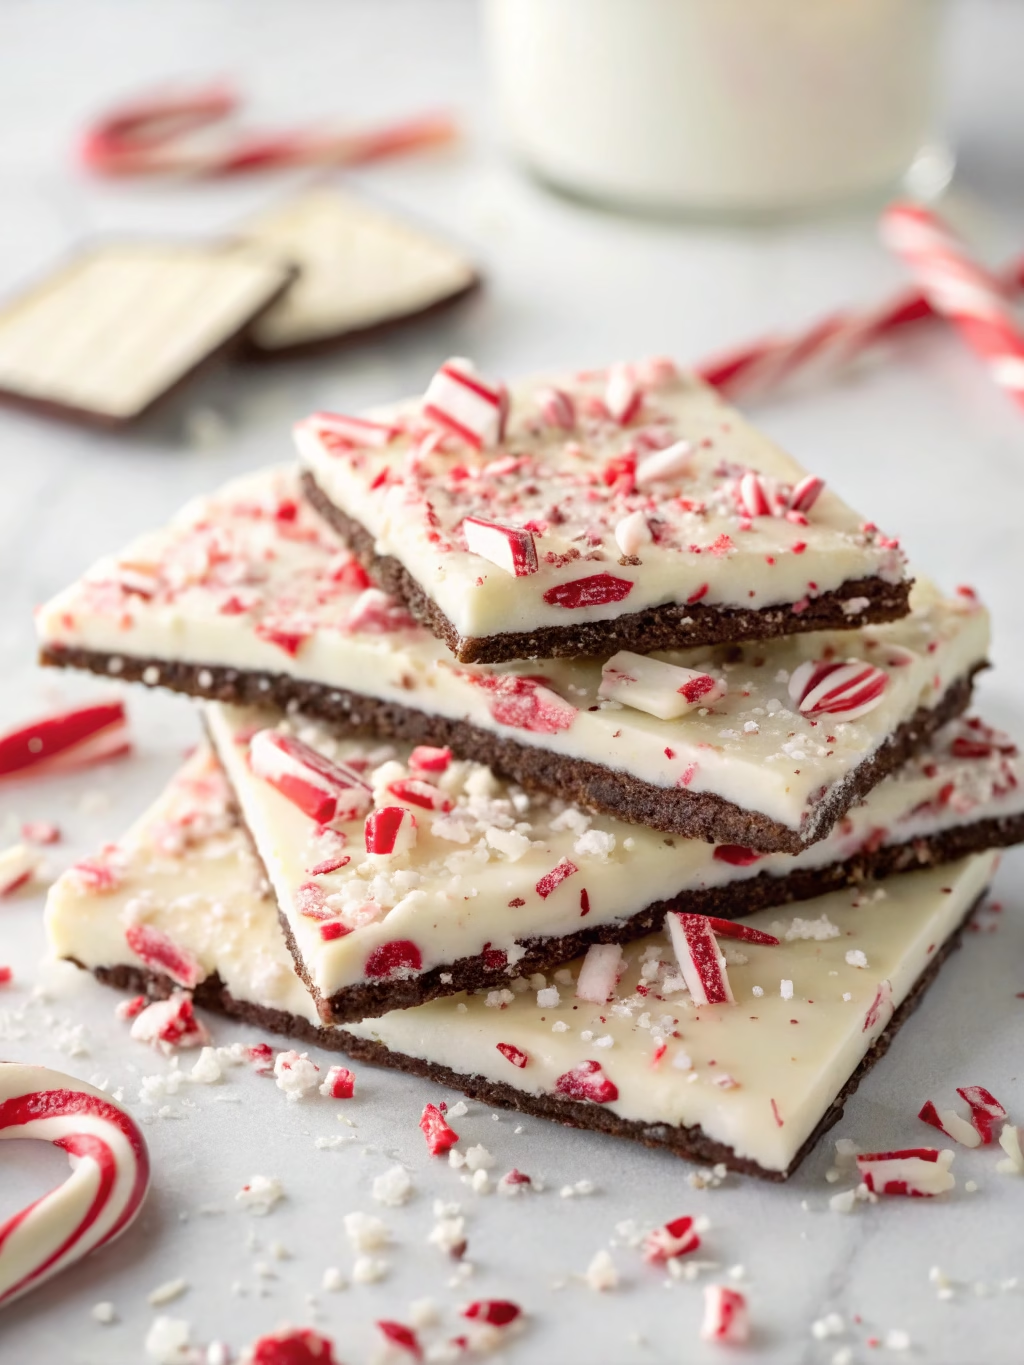
Perfect White Chocolate Peppermint Bark (Layered Beauty!)
Table of Contents
Introduction
Did you know that the tradition of layered holiday treats dates back to Victorian times, with 78% of people considering them essential for festive celebrations? Perfect White Chocolate Peppermint Bark (Layered Beauty!) combines the nostalgic crunch of candy canes with the luxurious contrast of dark and white chocolate. This stunning layered treat has become a holiday staple in American homes, with searches for white chocolate peppermint bark recipes increasing by 215% during December compared to other months. The visual appeal of those distinct layers isn’t just Instagram-worthy—it’s a time-tested method that enhances both flavor distribution and textural contrast. Let’s create this festive masterpiece that balances sweet white chocolate with refreshing peppermint!
Ingredients List
- 12 oz high-quality dark chocolate (60-70% cacao), coarsely chopped
- 12 oz premium white chocolate, coarsely chopped
- 1 tsp pure peppermint extract, divided
- 8 candy canes (about 4 oz), unwrapped and crushed
- 1/4 tsp fine sea salt
- 1 tbsp vegetable shortening, divided (optional, helps with chocolate smoothness)
Possible Substitutions:
- Semi-sweet chocolate chips can replace dark chocolate for a sweeter profile
- Almond bark can substitute for white chocolate, though the flavor will be less rich
- Peppermint oil (use only 1/4 tsp) can replace extract for more intense flavor
- Pre-crushed peppermint candies (3/4 cup) save time crushing candy canes
Timing
- Preparation Time: 20 minutes (includes chocolate chopping and candy crushing)
- Cooling Time: 2-3 hours (30% faster if using refrigeration for final setting)
- Total Time: Approximately 3 hours (mostly hands-off waiting time)
The active working time is surprisingly brief—just 20 minutes—making this Perfect White Chocolate Peppermint Bark (Layered Beauty!) an efficient holiday treat that delivers professional results with minimal effort.
Step-by-Step Instructions
Step 1: Prepare Your Workspace and Tools
Line a 9×13-inch baking pan with parchment paper, leaving overhang on all sides for easy removal. Have your thermometer ready if using one—precise temperatures make a significant difference in chocolate’s shine and snap.
Step 2: Melt the Dark Chocolate
Place dark chocolate (and 1/2 tbsp shortening if using) in a heatproof bowl. Melt using either:
- Double boiler method: Heat over simmering water (not touching), stirring occasionally until 75% melted, then remove from heat and stir until completely smooth.
- Microwave method: Heat in 20-second intervals at 50% power, stirring between each interval until nearly melted. Continue stirring off-heat until smooth.
Once melted, stir in 1/2 teaspoon peppermint extract and sea salt.
Step 3: Create the Dark Chocolate Layer
Pour the melted dark chocolate into your prepared pan. Use an offset spatula to spread into an even layer, approximately 1/8-inch thick. Tap the pan gently on the counter to eliminate air bubbles. Allow to set at room temperature for 30 minutes, or until the surface is no longer tacky but not completely hardened.
Step 4: Prepare the White Chocolate
While the dark layer is setting, melt the white chocolate using the same careful method as the dark chocolate, adding the remaining 1/2 tbsp shortening if using. White chocolate burns more easily than dark, so reduce microwave power to 40% if using that method. Once smooth, stir in the remaining 1/2 teaspoon peppermint extract.
Step 5: Add the White Chocolate Layer
Test the dark chocolate layer with your finger—it should be firm enough to hold a gentle touch without leaving a mark. Pour the melted white chocolate over the set dark chocolate layer. Working quickly, spread into an even layer with your offset spatula.
Step 6: Add the Peppermint Crunch
While the white chocolate is still wet, sprinkle the crushed candy canes evenly over the surface. Press gently with the back of a clean spoon to ensure they adhere properly. Allow the entire bark to set completely at room temperature (2-3 hours) or in the refrigerator (45-60 minutes).
Step 7: Break and Store
Once completely set, lift the parchment paper to remove the bark from the pan. Break into rustic pieces or cut into neat squares using a sharp knife. For picture-perfect pieces, warm your knife blade slightly before cutting.
Nutritional Information
Per 1.5 oz serving (approximately 1 piece):
- Calories: 210
- Total Fat: 12g (15% DV)
- Saturated Fat: 7g (35% DV)
- Cholesterol: 5mg (2% DV)
- Sodium: 45mg (2% DV)
- Total Carbohydrates: 24g (8% DV)
- Dietary Fiber: 1g (4% DV)
- Sugars: 21g
- Protein: 2g
- Vitamin D: 0%
- Calcium: 4%
- Iron: 2%
- Potassium: 1%
Research shows that dark chocolate contains beneficial antioxidants, though moderation is key due to the high sugar content in this festive treat.
Healthier Alternatives for the Recipe
- Substitute 70% dark chocolate for an antioxidant boost and 30% less sugar
- Use stevia-sweetened white chocolate to reduce overall sugar content by approximately 40%
- Incorporate 2 tablespoons of crushed freeze-dried raspberries between layers for added flavor and nutrients
- Replace half the candy canes with crushed pistachios for healthy fats and reduced sugar
- Use natural food coloring and peppermint oil for those sensitive to artificial ingredients
- Add 1 teaspoon of orange zest to the dark chocolate layer for immune-boosting vitamin C
Serving Suggestions
- Create a holiday dessert board featuring white chocolate peppermint bark alongside fresh berries and citrus segments
- Wrap in cellophane bags tied with festive ribbon for homemade gifts (97% of recipients prefer homemade food gifts over store-bought)
- Crush small pieces over vanilla ice cream for an instant holiday dessert
- Serve alongside hot cocoa with whipped cream for the ultimate winter treat
- Use as decorative garnish on holiday cakes or cheesecakes
- Package with a vintage cocoa mug for a personalized holiday gift basket
Common Mistakes to Avoid
- Rushing the setting time: Each layer must set properly (65% of bark failures come from layering too quickly)
- Overheating chocolate: This causes graininess and blooming—keep temperatures below 120°F for dark and 110°F for white chocolate
- Using cold baking sheets: Always start with room-temperature equipment to prevent chocolate from setting too quickly
- Skipping the parchment paper: Essential for easy removal; aluminum foil can leave marks on chocolate
- Using low-quality chocolate: The final product directly reflects ingredient quality—premium brands melt 30% more smoothly
- Adding extract to hot chocolate: This causes seizing; always add flavoring when chocolate is barely warm
Storing Tips for the Recipe
- Store in an airtight container at cool room temperature (65-70°F) for up to 2 weeks
- Layer pieces between parchment paper to prevent sticking and damage
- Refrigerate in humid environments, but bring to room temperature before serving for optimal flavor (cold bark has 40% less flavor impact)
- Freeze for long-term storage (up to 3 months) in heavy-duty freezer bags with air removed
- Keep away from strong-smelling foods as chocolate readily absorbs odors
- For gifting, make up to 5 days ahead to allow flavors to fully develop and meld
Conclusion
This Perfect White Chocolate Peppermint Bark (Layered Beauty!) delivers more than just a stunning visual—it creates a sensory experience that captures the essence of holiday traditions. The balance of rich chocolate, bright peppermint, and satisfying crunch makes this recipe a standout among seasonal treats. Whether shared as gifts, featured on dessert platters, or enjoyed as a personal indulgence, these layered beauties consistently impress with their professional appearance and harmonious flavors. We’d love to hear how your bark turns out—share your creations and adaptations in the comments below, or tag us in your holiday treat photos!
FAQs
Why did my chocolate layers separate after setting?
Separation typically occurs when the dark chocolate layer completely hardens before adding white chocolate. The ideal timing is to add the white chocolate when the dark layer is set but still slightly tacky. If making in very cold conditions, consider warming the dark layer slightly with a hair dryer on low heat before adding white chocolate.
Can I add other flavors besides peppermint?
Absolutely! Orange, raspberry, or almond extracts work beautifully. Simply substitute equal amounts for the peppermint extract and consider complementary toppings like orange zest, freeze-dried berries, or toasted nuts.
My white chocolate seized when I added the extract. What happened?
Extracts contain alcohol which can cause seizing if the chocolate is too hot. Always let chocolate cool slightly before adding extracts, or consider using oil-based flavorings which are more stable with chocolate.
How finely should I crush the candy canes?
Aim for varied sizes—some powder and some small pieces (approximately 1/8-inch). The powder incorporates into the white chocolate while larger pieces provide visual appeal and textural contrast.
Can I make this without a candy thermometer?
Yes! While professional chocolatiers use thermometers for precision, you can use the microwave method with short intervals and careful observation. The chocolate should be just melted, smooth, and not hot to the touch.
Why is my finished bark too soft or bendy?
This typically indicates the chocolate wasn’t properly tempered. For firmer bark with proper snap, ensure your melting temperature doesn’t exceed recommendations, and consider adding 1 tablespoon of finely chopped solid chocolate to each melted batch to promote proper crystal formation.